
In the life of a cricket player, there comes a time when we need to buy a new cricket bat or replace an old one! But, perhaps even more important than buying a new bat is the treatment that you need to give once you have purchased a cricket bat!
You do not want to end up in a situation where your new cricket bat gets cracked soon! After all, a good cricket bat is costly, and a little pre-processing can greatly enhance its life! This is where knocking-in a cricket bat comes handy.
Knocking-in is a process of preparing a cricket bat for use. It helps condense the fibers of the willow and make the bat stronger. It is done using a mallet that is hit on the surface, edges, and toe of the bat. Knocking-in, in combination with oiling, helps the bat last longer.
You may be wondering why is it that you can’t use your new cricket bat directly in a match! So, in today’s article we answer that and other questions around this topic along with sharing the detailed procedure for knocking-in a cricket bat correctly!
Why do Cricket Bats need Knocking-in?
Decent modern-day cricket bats are costly. It would be unwise to use them for batting without making them ready to take the leather ball impact by properly knocking them in.
Many a time the bat breaks from the first few impacts leaving the bat owner befuddled as to what went wrong. That is why it is important to understand what is knocking-in and how to do it properly. So what does knocking-in do to a cricket bat?
All cricket bats are pressed during the manufacturing process. The pressing gives a bit of conditioning and enhances the power of the bat. A well-pressed bat has better longevity. All cricket bats break eventually. A good knocking-in makes sure that the bat lasts longer and does not break due to the first few initial impacts of the hard leather ball.
Did You Know?
The knocking-in is an essential process in making the bat ready to be used for batting as it helps fibers of the willow in the face and edges to compress further to create a barrier. This barrier helps the bat to bear the impact of the fast cricket ball.
The process does not take much time, generally, 6 hours of knocking is good enough. If done properly, knocking-in can significantly improve the lifespan of the bat.
A little due diligence in understanding the process of knocking-in would go a long way in ensuring that you have a perfect tool performing at its highest potential when it comes to your turn to bat in a match.
It is really not that difficult. All that is needed is a little meticulous approach and a bit of patience and a lot of controlled hitting with a mallet – the knocking-in.
Step-by-Step Procedure to Knock-in a Cricket Bat
The cricket bat knocking-in procedure can be divided into two separate entities – oiling and knocking-in. But, before we go further in to the process, let’s first understand the items needed to knocking-in a cricket bat so that we are ready to roll with the process.
Items needed for knocking in a bat
Keep the following items ready before beginning the procedure –
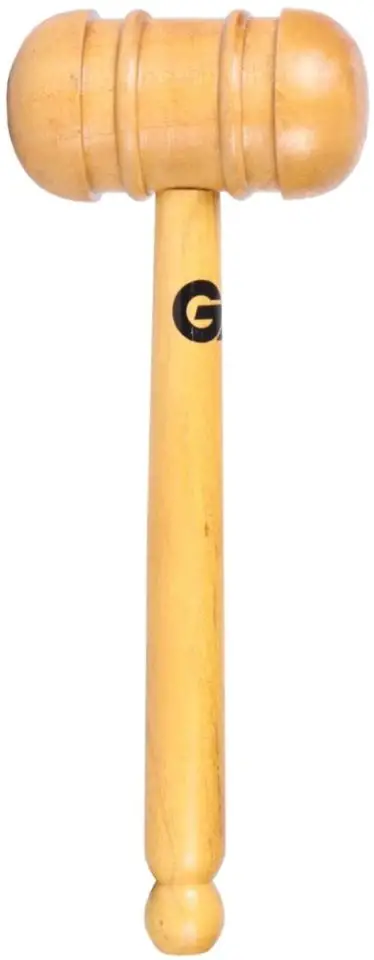
- A cricket bat mallet – The most essential item in the knocking-in process. You can buy a decent bat mallet on amazon.
- Linseed oil or specialist cricket bat oil – These are essential for the oiling phase.
- Sandpaper – To clean the surface of the bat before oiling.
- A soft rag – To clean up the bat after oiling.
All these items are sufficiently easy to obtain and are not that costly.
Now if you have all these ready with you, let’s proceed with understanding the step-by-step procedure for oiling and knocking-in a cricket bat.
Oiling a Cricket Bat – What Does Oiling do to a Cricket Bat?
All the cricket bats that are made using natural wood must be oiled appropriately using linseed or special cricket bat oil. The cricket bats generally crack or split due to the lack of moisture in them. Oiling helps maintain the moisture levels in the bat.
Care must be taken to avoid too much oil as it will be as detrimental as using insufficient oil. Some players dip the bat in oil which is a complete no-no. Oiling is done prior to the knocking-in process. Also, oiling must to done on specific parts of the bat only.
Steps to Oil the Cricket Bat
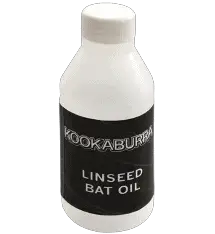
- Clean the surface of the bat lightly using 180-200 grit sandpaper. Once clean, you can either use raw linseed oil or specialized bat oil like Gray-Nicolls Linseed Oil [on Amazon] for the oiling.
- Get some oil on the soft rag and apply a thin coat to face, edges, toe, and back of the bat. ‘Thin’ is a very important word here. Do not overdo this step. Over oiling will deaden the fibers of the timber and would affect the performance.
- Also, make sure not to oil the bat at the splice, handle, or the labeled part. This might affect the glue that holds these parts together.
- Now, keep the bat lying horizontally overnight with the face of the bat pointing up. Make sure the bat is completely dry in the morning.
Repeat the above procedure a couple of times. It can not be overstated that you must use just enough oil. Too much oil will damage your bat.
Also, some cricket bats come with “scuffs” – a protective cover on the face. It is not necessary to apply oil to the scuffed area on the bat. The oil is essentially applied to the timber. Anything else should be excluded from the oiling process.
Now as the oiling process is done. The bat is ready to be knocked-in. The knocking-in process is not that hard, all it needs is patience and dedication to go the process meticulously.
Knocking-in a Cricket Bat: Stage One
The first part of the knocking-in of a cricket includes the following steps –
- Before starting the knocking in process, make sure that any excess oil from the oiling phase has been wiped off and the bat surface is completely clean and dry.
- Begin the knocking-in process from the face of the bat. Hold the mallet and start hitting the face of the bat firmly, but not too hard, in the initial phase of a couple of hours. The hit may make a small dent in the face of that bat, anything more than that means you are hitting it harder than you are supposed to.
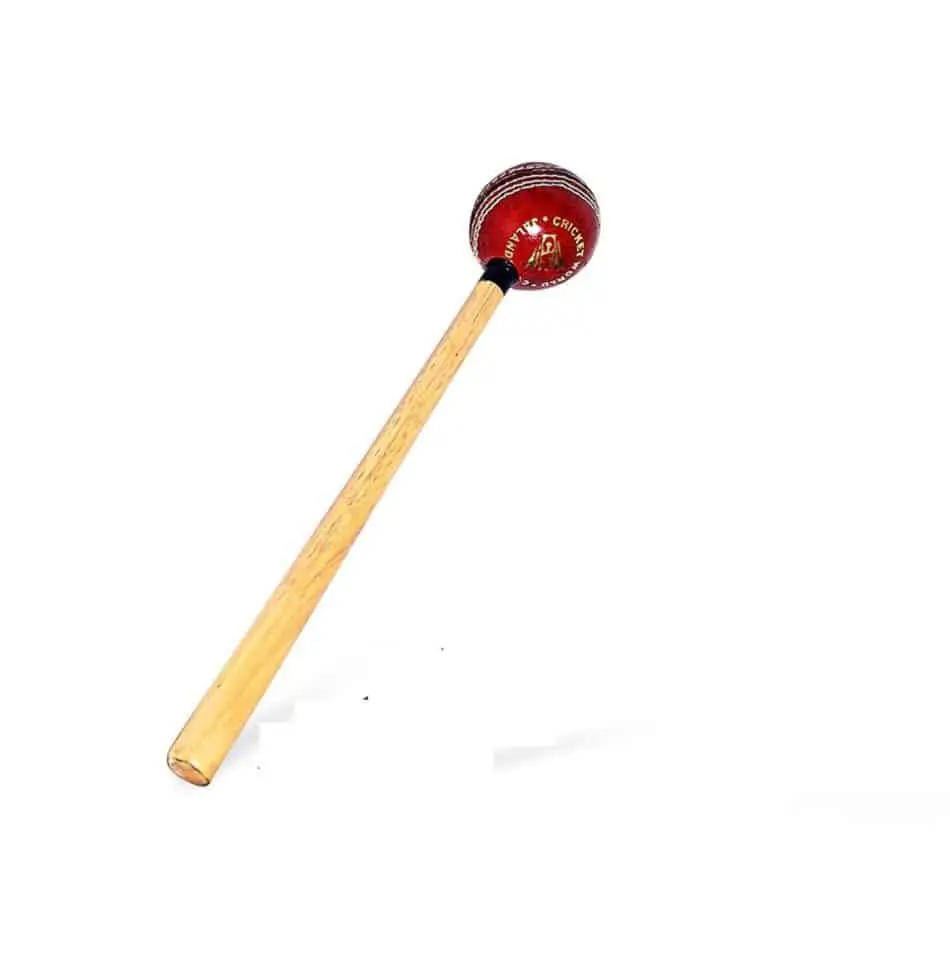
Note: An old cricket ball can also be used for the knocking-in process, but it is recommended to use a mallet as give you better control while hitting the bat surface.
- While hitting the bat surface, make sure you are hitting it uniformly in the areas not covered by stickers. The bat can break at any place that is not compressed enough with sufficient knocking-in. If the bat surface is hit haphazardly, it might leave some areas insufficiently knocked-in which will make the bat vulnerable at these spots. It will defeat the purpose of knocking-in if the bat breaks at those points.
- General mistake players do during the knocking-in process is to hit only the 10-30 cm area at the bottom of the blade. Although this is the area that will be used mostly to hit the ball, it is important to knock-in the entire blade uniformly.

- The best way to achieve uniformity is to start with the edges and then move up and down the central blade while consistently hitting the surface with the mallet with enough pressure. Increase the pressure as you move ahead in the knocking-in process.
- Take special care while knocking in toe and edges of the bat. Many players doing the knocking-in for the first tie make the mistake of directly hitting the toe and edges of the bat with the mallet head.
- It is important to understand that the purpose of knocking-in the toe and edges is to make them round these areas along with hardening them. The best approach to do that is to apply glancing blows to these areas instead of direct blows. Some players use the back of the mallet to perform knocking-in at toe and edges.
- One can start with an angle of mallet closest to the blade and then gradually move the edge where the angle would become 90 degree. Continue this process along the edges and toes.
Note: Toe and edges need special attention because most of the poorly knocked-in bats break at these places.
- Do not hit the back of the bat and the area around the splice with the mallet. The back of the bat is not used to strike the ball and the splice runs the risk of getting loose if hit by the mallet.
- It is also advised to oil the bat in between the knocking-in process at least twice. Generally, the oiling procedure is repeated after 2nd and 5th hour. Please refer to the article above to perform the oiling.
It is important to note that before the oiling process the bat needs to be sandpapered again to clean up the surface. Although the overall knocking-in process may need about 6 hours, the intermittent oiling makes it a multi-day project.
Note: Do not ignore the intermittent oiling just because it elongates the knocking-in process. Remember that insufficient oil is as detrimental for the bat as too much oil.
- While performing the oiling and knocking-in process in cycles, gently press your fingernails against the bat every now and then. In the beginning, this will leave some mark on the bat surface but as we go along the bat will be pressed more and this it will be difficult to make these marks with fingernails.
Here’s a good video on the knocking process. https://www.youtube.com/watch?v=7XzreSR98Is
Once you have put in 6 hours of knocking-in efforts, do check if the bat has sufficient oil. To do that, run your finger across the blade of the bat using a reasonable amount of pressure. If there is a little oil on your finger, the bat has enough oil.
If the oil is not there, then the bat may need some more oiling. Repeat this process of checking the oil every 3 to 4 weeks. Stage one ends when the above steps are completed and the bat is ready to graduate for Stage two.
Knocking-in a Cricket Bat: Stage Two
Your bat needs to be treated like a child. It should be slowly and steadily introduced to the harsher conditions – to the impact of a high-speed cricket ball in this case. Stage two is relatively simpler and kind of certifies the work done in phase one. If stage two does not yield expected results, do not hesitate to go back to stage one.
Stage two involves giving short distance catches with an old ball. Two things to note here, first, the ball should not be brand new or too old, meaning the seam should be pronounced – not too soft. Second, it should be a quality cricket ball.
Note: A leather ball mallet, shown below, can also be used for this purpose for controlled hitting purposes in stage two as explained in the video above.
Try to give the catching practice for an hour or so. Hit the ball at various places of the bat including the edges. Check the bat in between to see if there are seam marks on the bat.
If you find that marks are being created on the bat in certain parts, try to knock-in these areas for about half an hour and repeat the stage two process.
If the seam marks are still seen on these parts, it means the knocking-in process done until now is not sufficient – at least not sufficient in the part where the marks are seen.
If such a situation arises, please go back to stage one and do some more knocking-in. If there are no marks on the surface or edges of the bat, it can be concluded that the bat is ready to be played-in – which is the next and final step in the knocking-in process.
Knocking-in a Cricket Bat: Stage Three – Playing-In
Now your bat has become stronger. But it would be unwise to directly send it to the battlefield – the live match in this case. It would really be a waste of effort if you take the bat to the middle in a live match against a new ball, without playing in first, and it broke.
That is where you take advantage of practice sessions in the nets to play the bat in. Get your batting gears on and get ready to bat in the nets with your newly knocked in bat. Ask your bowlers to bowl at you with older, but quality, leather balls. If you have the bowling machine in your facility, use that to deliver medium pace deliveries at you with old balls.
Try not to hit the shots immediately. Play with soft hands, to begin with. Try to deliberately hit different parts of the bat. It is okay to get some edges at this point. Let the balls hit the toe of the bat once in a while. Remember, you are trying to check every part of the bat.
It is generally recommended to have at least two net sessions as a part of the playing-in process. In the first session, try to keep things simple and avoid overhitting. In the second one, gradually begin to be more aggressive and play full-fledged shots.
However, keep playing with a straight bat and delay the cross-batted shots until the end of the second net session when you are confident that the straight batted shots are coming off nicely.
If all goes well, you can consider the knocking-in process complete. You now have a bat that is ready to go to the middle and play against those fast new ball deliveries. As mentioned above, keep monitoring the bat for dryness or marks of the seam and use oiling and focused knocking as and when needed.
How Long should you Knock-in a Cricket Bat?
A general consensus is that about 6 hours of dedicated knocking is good enough for the bat to be ready for normal catching practice and the playing-in phase.
However, these 6 hours would seldom be in one stretch. As mentioned already, the knocking-in process involves oiling intermittently. Oil takes time to be absorbed and the surface to dry up for further knocking.
Thus, however, actual knocking-in may take about 6 hours, the complete knocking-in process is a multi-day event.
Is it Possible to Knock-in the Cricket Bat Too Much?
In theory, it is possible to knock the bat in too much. However, that would take some doing. As it is, the knocking-in process requires a lot of dedication and patience before you start using the new willow in the live match. Not many would have the patience to overdo it.
Having said that, if some carried away soul kept on hitting the bat with the mallet for a longer duration, then yes, theoretically, it would be called a too much knocked-in bat.
The purpose of knocking-in is to maintain the moisture in the bat but make the surface compressed enough to handle the impact. A properly knocked-in bat does not lose the natural “spring” in the bat however an overly knocked-in bat risk losing that natural spring which is essential for stroke-making.
How Do you Know if your Cricket Bat is Knocked-in and Ready to be used?
There are various ways to make sure if the bat is completely knocked-in or not.
1. Seam Marks
The first one would be to put it under a light impact of good quality cricket balls. Increase the speed of the ball as you go along. If the seam of the ball does not leave any dents on the bat surface, then the bat is ready for the real play.
2. Bat Weight is lighter after Knocking-in
Another easy, but not a full-proof, method is to compare the weight of the bat before and after knocking-in. A well knocked in bat would feel lighter compared to a new bat due to all the compressing that happens because of the knocking-in.
3. Sound of the Cricket Bat
Here’s another indication of a well knocked-in bat. A bat that has been knocked-in properly would produce a confident light sound on impact with the leather ball, especially at the sweet spot.
Whereas a brand new bat, without knocking-in, would produce a would give out a shallow sound when presented against the leather ball.
Be gentle while starting up with the recently knocked in bat, so that if any issue is found, the bat would be in a good condition for the issue to be rectified.
What are Anti-scuff Sheets and Fiberglass Edge Tape?
Some bats come with anti-scuff sheets applied on the surface of the bat.
However, it is advisable to put the anti-scuff sheet on the surface of the bat after the knocking-in process is completed.
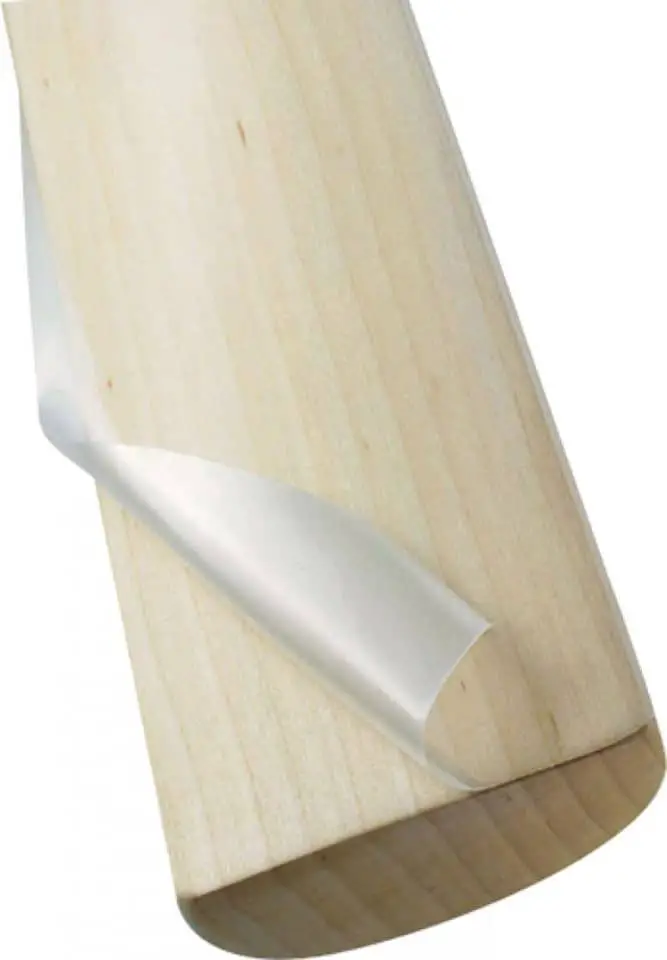
The advantage is that the anti-scuff sheets would stick to the bat better after the oiling and knocking-in processes are completely done. Of course, the application of the anti-scuff sheet is optional, however, it is highly recommended as they would help prolong the life of the bat.
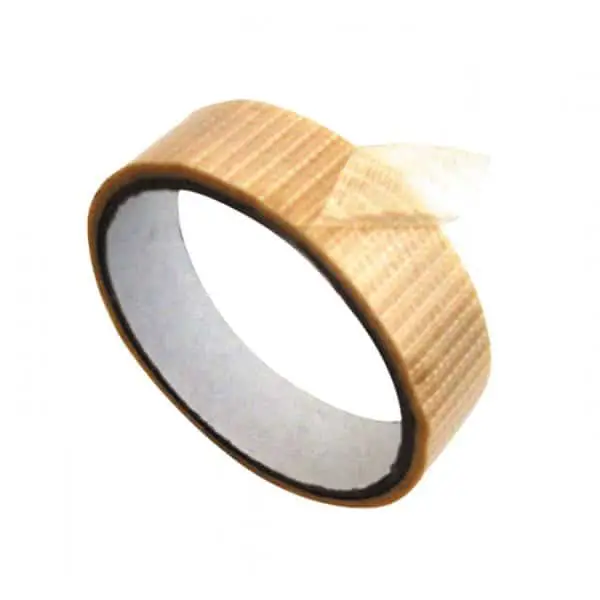
Additionally, you can also use the fiberglass edge tape to protect the edges and the toe. Toe and edges of the bat are vulnerable to breakage even after the knocking in process. The fiberglass tape would help protect from that as much as possible.
If you have decided to apply any of these, make sure to apply them after the oil at the bat surface, edge and tow have been dried up completely.
What are Pre-knocked Cricket Bats?
Pre-knocked bats are the ones that come prepared with the oiling and knocking-in process in the factories itself. Bat manufacturers are aware that once the bat is made, it has to be knocked-in for it to be ready for play.
However, it is a costly process for the manufacturers which increases the cost of the bat. Hence, in general, the manufacturers, in order to keep the bat affordable, sell them without oiling and knocking in.
Anyway, pre-knocked-in or not, it is still advisable to do a little bit of oiling and knocking-in of your own once a new cricket bat is purchased.
Precautions to Take while Oiling and Knocking-in a Cricket Bat
Here is a quick list of precautions to be taken while oiling and knocking in the bat.
- Never over-oil your bat and avoid oiling the handle and splice of the bat as it has an adverse effect on the adhesives.
- A typical mistake is to stand the bat upright in the oil. Again, that would be too much oil for the bat to take.
- The bats need to be kept horizontally for extended periods after oiling. The aim is to let the oil be soaked in on the bat throughout whereas keeping it vertically would assemble the oil at the toe end of the bat.
- This can not be stressed enough that the edges need to be glanced off while knocking-in, not hit at right angles. The purpose is to make the bat around at the edges.
- Use quality balls while giving throw-downs or in the playing-in phase.
- Lastly, never hit the back of the bat, the splice, and the area of the bat stickers.
Final Thoughts
Bats are a very dear subject to a lot of batsmen. You must have observed certain batsmen checking their bat frantically when they hit a bad shot or some weird sound comes when the leather ball hits the bat. Imagine their plight, when they realize that the damage to their bat could have been avoided with a few days of care with oiling and knocking-in.
This article is for all those players who want to elongate the life of their bat and improve their own performance along the way. Moreover, good cricket bats are costly. It would be a shame to lose all that money for not following a few simple procedures of oiling and knocking-in.
Hope this article proves useful the next time you buy a bat and perform the knocking-in.
